User Guide: Overtime tracking, management, and reporting
First published on August 4, 2025 , updated on August 7, 2025This guide is designed to help you track, manage, and report overtime hours effectively. Whether you are an employee recording your overtime, a line manager reviewing entries, or an HR administrator configuring overtime categories and policies, this article provides clear instructions and troubleshooting tips. You will learn how to record overtime in timesheets, understand status indicators, and generate useful reports for HR processing.
Detailed explanation
Overtime management is a critical component of ensuring that extra hours worked are accurately recorded and processed. The core features include:
Tracking overtime in timesheets: Employees with overtime policies can record overtime hours directly in their timesheets. The system calculates overtime based on the difference between defined working hours, tracked activities, and any previously recorded overtime.
Categorizing overtime: Overtime can be categorized, for example as payroll mutation or time-for-time. Employees can add notes and select categories to better track how their overtime should be processed.
Status indicators and approval: Each recorded overtime entry displays a status indicator that can be Draft, Submitted, or Approved. When overtime entries are submitted, certain entries may require approval by a line manager. If changes are made to a submitted entry, its status automatically reverts to Draft.
Reporting for HR processes: A dedicated report within the back office exports overtime data, including year, week, date, employee details, category, hours, notes, and status. This report is used for creating payroll mutations and other HR solutions.
Overtime policy management: HR administrators can create and manage overtime categories and policies. This includes the option for time off in lieu (TOIL), where overtime hours are added directly to an employee's leave budget.
Step-by-Step Guide
For Employees: Recording Overtime
Access Your Timesheet: Open your timesheet view. Any day with overtime will display an icon indicating recorded overtime hours.
Review and Specify Overtime: If an overtime entry is not fully specified, the icon may change color (e.g., turn orange with an exclamation mark). Click on the icon to open the overtime detail dialog.
Enter Details: In the overtime dialog, the hours are pre-calculated based on your working hours. Confirm the overtime hours, select the appropriate overtime category, and add an optional note if necessary.
Submit Overtime: Once the details are confirmed, submit the overtime entry using the existing submit button. If the entry is in draft, it will then be forwarded for manager approval if required.
For Line Managers: Approving Overtime
Receive Notification: After an overtime entry is submitted, you will receive a notification along with a summary of the overtime details, including date, hours, category, and any accompanying notes.
Review Entries: Check the list of overtime entries grouped by category. Compare the entries to ensure all overtime hours are categorized correctly.
Approve or Reject: If everything looks correct, click on the Approve action to mark the entry as approved. If adjustments are necessary, reject the entry. On rejection, the employee will be notified, and the entry status will revert to Draft.
For HR administrators: managing policies and reporting
Overtime category & policy setup: In the back office, create and manage overtime categories by defining names, descriptions, and whether they count as TOIL. Group these categories into overtime policies which can be assigned to employees.
Generating Overtime Reports: Navigate to the ‘Overtime Entries’ report section. Use the selection filters including start date, finish date, overtime category, and employee. Generate the report that exports detailed overtime data necessary for HR processing and payroll mutations.
Visual aids
The application provides several visual cues to help you navigate overtime management:
Timesheet Icons: Icons on timesheet cards indicate overtime presence. To identify incomplete entries, look for notifications such as color-coded symbols and exclamation marks.
The first indicator is shown in the list of timesheets.
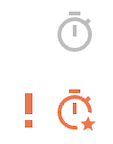 The second indicator shows that the overtime in the timesheet needs to be specified.
Overtime Dialogs: When you select an overtime entry, a dialog window displays pre-filled overtime details, categorization options, and a field for notes. These visual aids ensure you understand which entries require further action.
The first indicator shows that no further action is needed in the timesheet on overtime.
 The second indicator shows a specified and submitted overtime entry.
Troubleshooting tips
Missing Overtime Details: If an overtime icon appears but no detailed entry is accessible, verify that your overtime policy is correctly set up in the employee settings.
Incorrect Overtime Calculation: When calculated overtime hours do not match expectations, review your working hours, tracked activity, and any previous overtime entries. If discrepancies persist, consult your manager or HR administrator.
Submission Issues: If overtime entries revert to Draft after editing, remember that modifying submitted entries automatically changes the status. Re-submit once the changes are finalized.
Approval Delays: If a manager does not receive an overtime approval notification, ensure that the overtime category settings require approval and check the notification settings in the system.
By following these guidelines, you can effectively manage overtime records, ensure accurate tracking, and support smooth integration into HR systems. For any further assistance, please consult your system administrator or HR representative.